Monday, September 27, 2010

Chocolate and Cheese Danish? Yes Please!!

New Post, this just in!!! Chocolate and Cheese Danish are Amazing!! Read all about it!!

The other day I was watching "Giada at Home" (duh, what else would I be watching on my day off?) and she made Chocolate and Cheese Danish. The episode featured several desserts she learned to make at cooking school in Paris. This particular one, she said, was one of her favorites. One she remembered making in her little apartment often. One she holds close to her heart.

While watching her make this dessert, I soon realized that this might be pretty easy for me to make myself. When she took them out of the oven and tasted one, omigosh....It seriously, no lie, looked like she took a bite out of heaven. That danish looked SO fabulously delicious, at this point I knew I HAD to try it. I had no choice in the matter ; )

I was indeed correct in the fact that making the danish, was fairly easy! Preparation and baking took up little time. The filling is simple - all you do is mix together all of the ingredients in a bowl. Of course using the cheeses at room temperature and folding in the chocolate chips. The puff pastry (I love saying puff pastry...) was store bought, so all I had to do was take it out of the fridge and cut it into 4 equal squares and put the filling in the middle. Fold up the pastries with the filling in the center, brush a bit of egg wash over it and voila! Oven ready!!

I was also correct in saying...my first bite of that pastry, was indeed a little 'bite' of heaven. It was so scrumptious...there are no words. Every female (who loves chocolate) will love this pastry!! I know y'all are drooling by now, so here is the recipe!! ENJOY!!


Chocolate and Cheese Danish - Giada De Laurentiis


Ingredients

Filling:

  • 1/4 cup (2 ounces) cream cheese, at room temperature
  • 1/4 cup (2 ounces) mascarpone cheese, at room temperature
  • 1 egg yolk
  • 1 tablespoon all-purpose flour
  • 3 tablespoons sugar
  • 1/2 teaspoon pure vanilla extract
  • 1/8 teaspoon fine sea salt
  • 1/2 cup mini chocolate chips
  • 2 (9-inch-square) sheets frozen puff pastry, thawed
  • 1 egg, beaten

Directions

Put an oven rack in the center of the oven. Preheat the oven to 400 degrees F. Line 2 baking sheets with parchment paper. Set aside.
Filling: In a small bowl, mix together the cheeses, egg yolk, flour, sugar, vanilla and salt until smooth. Fold in the chocolate chips. Set aside.
Cut each sheet of pastry into 4 equal-sized squares. Put 4 pastry squares on each prepared baking sheet. Spoon about 2 to 3 teaspoons of the filling into the center of each piece of pastry. Fold 1 corner of the pastry diagonally over the filling to within 1-inch of the opposite corner. Using a pastry brush, brush the folded-over section lightly with the beaten egg. Fold the opposite corner over the egg-brushed pastry to form an open-ended Danish. Brush the pastry with beaten egg and bake until puffed and golden, about 15 minutes. Remove from the oven and cool for 5 minutes before serving.


**Recipe belongs to Giada De Laurentiis and can be found on the Food Network website**
Photo is my own!

Saturday, September 25, 2010

Mozzarella Balls Anyone??

So, there's that famous phrase "you learn something new everyday" and with cooking, I feel like you really do!!

Yesterday's dinner was a nice big salad from the salad bar at the grocery store I work at. Being a cashier, I see all kinds of ingredients and foods go through my lines and some of them I've never eaten or even seen before. One of them in particular has been catching my attention repeatedly....Mozzarella Balls. I do not know if that is what you even call them, but thats what I wanna call em!

In my salad last night, I decided to try some. They were a new item at the salad bar, which explains the popularity. Perhaps others like me, decided to give em a shot for the first time too! Or maybe they already know they like them and were excited to see them at the salad bar? Anyways, When I ate my first mozzarella ball...it tasted...bland to me at first, then I got the cheesy kind of aftertaste. They're good, but are better paired with other things. I kept dipping mine in my raspberry vinaigrette dressing and they were great with that. I wondered though, how else do people eat these?? What are they used for? So today I looked that up and found some interesting ideas...

One idea I really liked was Fried Mozzarella Balls. Those look SO good. Just like the mozzarella sticks you order at restaurants!! You can make them at home! How great is that?! Mmmm! Of course you gotta make the marinara sauce to go with them too!!

Another idea which seems to be popular, is pairing them with tomatoes, basil, and dressing. Here is one that features cilantro instead of basil ---->> Grape tomato and Mozzarella Balls!! I see recipes like this all the time and have always wondered what it tastes like!

These cheesy balls come in different sizes too. You can buy em large, medium, mini...whichever you prefer. Some people buy the larger ones, slice em up and layer them with tomatoes and herbs and olive oil for a nice tomato mozzarella sandwich. If it were mine, I might even add some sliced black olives...Love those!! Some people slice up the smaller ones and put them ontop of pizzas! Yum!! Many of you may have also seen them as an ingredient in antipasto salads, green salads, pasta dishes...they are surprisingly very popular. I just never really noticed or thought about what they were!!


See?? I learned all that today and tried something new in my salad last night. The best thing about cooking, is that it never gets dull or boring because even when you think you know it all, you learn something new. Whether it be from a book, online or a tip from a friend!! I love that about cooking!! : )

How would you enjoy your mozzarella balls??

Happy Cooking!!

*photos from google images, recipes are not my own!*

Sunday, September 19, 2010

American-Italian all'Amatriciana

Okay guys and gals...Jump aboard the Rachael Ray train!!

Now, I'll admit she's not my favorite chef (Giada's #1!!)....anyways, but I do watch her show from time to time, usually I'll be on my computer, reading, cleaning, and whatnot and "30 Minute Meals" will be on in the background. The other day I saw her make this dish and I thought 'this looks really easy and pretty good'. Of course I had to try it, right?!

Guess what was for dinner tonight?? ; )

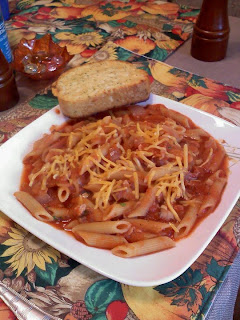
This dish is an american remake of an italian dish called Bucatini All'Amatriciana. Let me tell you, it is all about the bacon!! Yes Bryan, if youre reading this....this is the dish for you! It is basically a bacon tomato sauce with onion and garlic etc. With penne pasta. Mix all that together and Voila! You are supposed to shred some sharp cheddar to put ontop but I just bought the packaged shredded mild cheddar and that was just fine! I also used smoked bacon, red onion, a few cloves garlic and the chicken stock.  The sauce had an excellent smokey flavor to it thanks to the bacon...Very awesome!! My husband and I both were happy campers with this meal. I gave it 5 stars (Literally, I reviewed it on the food network site!) and I will definitly be making this again sometime!! : )

Ingredients

  • Salt
  • 1 pound whole-wheat cassarecci, rigatoni or penne pasta
  • 1 tablespoon extra-virgin olive oil
  • 6 slices lean peppered bacon, chopped
  • 1 large red onion, chopped
  • 4 cloves garlic, finely chopped or grated
  • 1 cup chicken stock
  • 1 (28-ounce) can crushed fire roasted tomatoes
  • Black pepper
  • A handful flat-leaf parsley, chopped
  • Shredded sharp white Cheddar, to pass at table

Directions

Heat water to boil for pasta, season with salt and cook pasta to al dente.
Heat a deep skillet over medium-high heat with extra-virgin olive oil, a turn of the pan. Add bacon and crisp 4 to 5 minutes then add onions and garlic cook to soften, 5 to 6 minutes. Stir in stock then tomatoes and season with pepper to taste. Simmer sauce 15 minutes. Toss pasta with sauce and parsley. Serve with grated sharp white Cheddar.

*This is a Rachael Ray recipe found on Foodnetwork.com*
*Bacon photo found on google images*

Saturday, September 18, 2010

My Fragrant Friend

Lets chat about one of me favorite ingredients to cook with shall we? He's very fragrant and very flavorful. People either love him or hate him...

If you guessed Garlic, you are indeed correct!!

As a kid growing up, I didn't care too much for anything garlic, not even garlic bread. I guess when I got older I must have developed a liking for it though. Now it is one of my favorites to use in the kitchen. My husband loves it too, if not more!

Some Fun Facts :

Decendents of garlic are believed to have been first found in Southwest Asia/China long ago. A couple relatives include onions and shallots. Garlic was even mentioned in the bible. The cloves found inside the bulb were used for culinary purposes as well as medicinal purposes. Nowadays, you can buy garlic vitamin supplements at the drugstore. Garlic is an antioxidant and is very good for your heart.

                                                                                  Garlic bulbs -->

If you're ever going to attract the attention of a Cullen, best to stay away from the garlic altogether ; ) Lets not forget the infamous fact that garlic will keep the vampires away too!!

I like to use garlic in just about anything I cook. Of course I haven't tried it in any desserts yet but I know people have done it! I just started using fresh garlic to put into sauces or mix in when sauteeing onions or veggies....I love it. I also use the minced garlic you can find in a jar, but I feel like that is less flavorful than fresh. If I want a bit more garlic kick, I just shake in a little garlic powder that I have on hand always right next to my stovetop!!

<--Cloves of Garlic


I love the smell while its cooking and the flavor it brings to the food I make. Come on, who doesn't love to have more flavor to their food?? Thats what makes food so awesomely enjoyable!

I know as I've stated earlier, you love it or you hate it...Those of you who think you hate it, why not give it a try next time with dinner?? A teeny bit won't hurt. You might even find you like it better in one dish than in another one...As for me, I will continue using my fragrant friend in just about everything I cook!! Mmm Mmm Good!!

Tuesday, September 14, 2010

There's Something You Should Know....

There's something I need to get off my chest. Something I think you all should know. Something I should admit....

I am an absolute complete spaz in the kitchen!! There I said it. *sigh*

I try so hard to follow recipes, not make a mess in doing so...juggling different tasks. "While blah blah is cooking, prepare this and that over here"...you know what I'm talking about. Things somehow slip out of my wet, slimy hands and onto the floor. I'm surprised I still have all my toes!! Meanwhile, the boiling water is bubbling over...Sauces are sticking to the bottom of the pot...I still have things to slice and dice (carefully!)...I'm the farthest cry from a pro thats for sure!

 Like that chicken I should have cut in half or flattened out before cooking it...yeah that was fun. That took forever to cook and I gave up on the last piece as it was almost burning but not fully cooked yet in the center.  Meanwhile I am looking around my kitchen in complete horror at the mess I made and I was just getting started!! I still had sauce and garlic bread to make....oh man....

I am so envious of the stars you see on TV. They make it look so darn easy...and I believe it could be. If I were someone else and not so spaz-like in the kitchen. I bet I could turn a bowl of cereal into a disaster!

I guess I'm just human right? Or maybe its just one of those special quirky qualities in me that my husband fell in love with....(I think I like that one) haha. I may not be a Pro to everyone else...but in my kitchen, Im the head chef and the food I make always comes out great. No matter how spazzy I am or how messy my kitchen becomes!! : )

Happy Cooking!!

**Pic from google images and wall decal from Joanns craft store!!**

Saturday, September 11, 2010

The "Taste" of Fall

Hello There!! Labor day is all over and the weather is cooling down from those hot summer days. The leaves are already starting to change color as well. I've started to decorate my home with adorable fall decorations and lighting my "Be Thankful" candle from Yankee Candle! (one of my favorites) So now it looks like fall, smells like fall...but somethings missing....hm. Oh! I got it! We need the "tastes like fall"!!

What better way to "taste" fall than with these adorable Pumpkin Cupcakes?! I was browsing cupcake recipes one night in hopes of finding more creative cupcake flavors other than vanilla, chocolate and red velvet and I stumbled upon this one. These are super cute and you can add things to it like choco chips or different spices...make your own frosting or use the store bought kind. I might sprinkle orange sugar ontop of mine. I'm so excited to try these and I will definitly post pictures when I do!!

Fall colors, Fall scents, Fall Flavors!! Is it just me? Or is everyone else this excited too? :)


Ingredients

 
2 cups all-purpose flour

1 teaspoon baking soda

1 teaspoon baking powder

1 teaspoon coarse salt

1 teaspoon ground cinnamon

1 teaspoon ground ginger

1/4 teaspoon freshly grated nutmeg

1/4 teaspoon ground allspice

1 cup packed light-brown sugar

1 cup granulated sugar

1 cup (2 sticks) unsalted butter, melted and cooled

4 large eggs, lightly beaten


1 can (15 ounces) pumpkin puree

Directions

1.Preheat oven to 350 degrees. Line cupcake pans with paper liners; set aside. In a medium bowl, whisk together flour, baking soda, baking powder, salt, cinnamon, ginger, nutmeg, and allspice; set aside.

2.In a large bowl, whisk together, brown sugar, granulated sugar, butter, and eggs. Add dry ingredients, and whisk until smooth. Whisk in pumpkin puree.

3.Divide batter evenly among liners, filling each about halfway. Bake until tops spring back when touched, and a cake tester inserted in the center comes out clean, 20 to 25 minutes, rotating pans once if needed. Transfer to a wire rack; let cool completely.


**Picture and Recipe from MarthaStewart.com**